

How To Create Custom Sequence In Premiere
Premiere Pro: Create a Custom Sequence Preset
![]() The easiest way to create a new sequence in Adobe Premiere Pro is to drag a clip containing the settings you want to use on top of the "folded paper" icon in the lower right corner of the Project panel. (See the screen shot below.)
The easiest way to create a new sequence in Adobe Premiere Pro is to drag a clip containing the settings you want to use on top of the "folded paper" icon in the lower right corner of the Project panel. (See the screen shot below.)

But, what if you don't have any clips that match your setting, or you need a specific setting for a multicam clip? In these instances, creating a custom sequence preset is your only option.
Here's how.
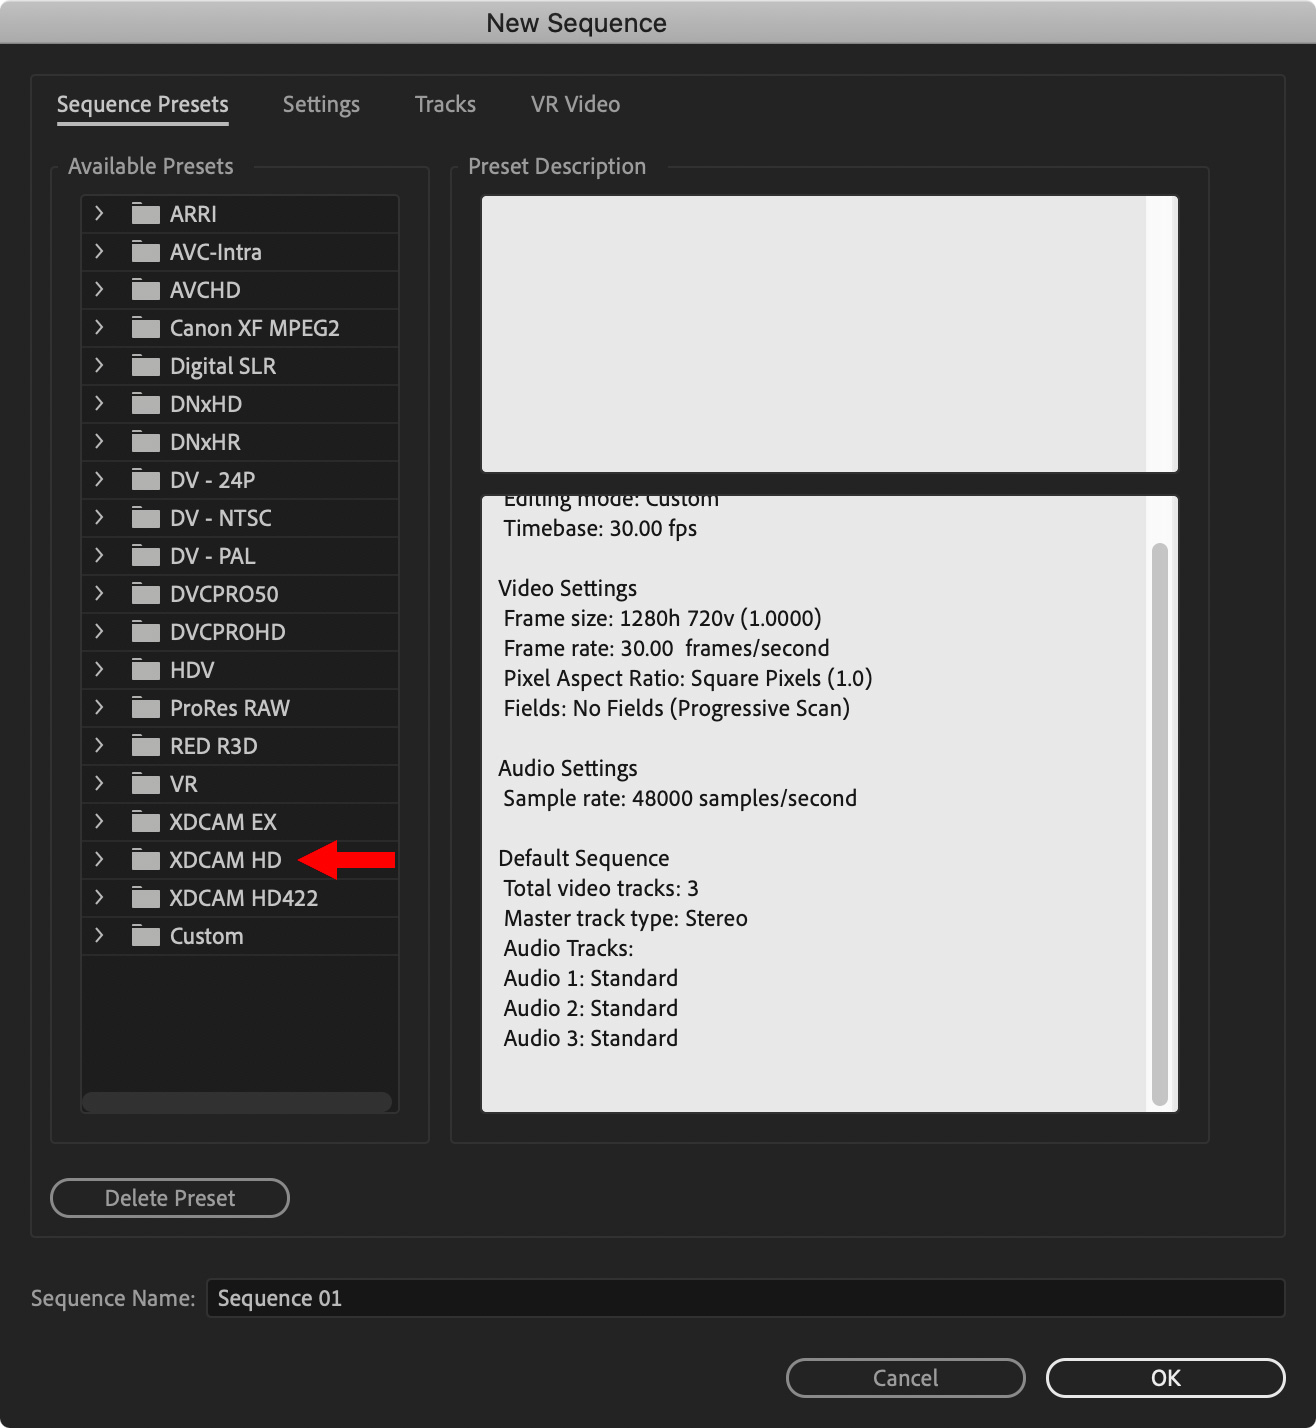
Select File > New > Sequence. This displays the New Sequence window.
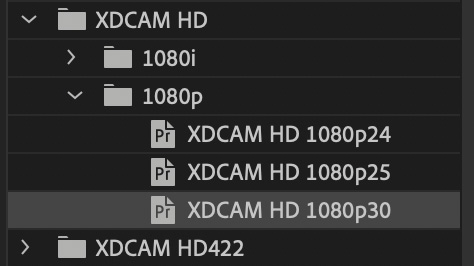
Select any of the Available Presets – for this example, I chose XDCAM HD > 1080p30. Why? Because we will change all these settings in the next step.
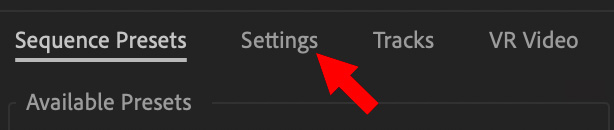
Click the Settings text button at the top of the window.
VIDEO
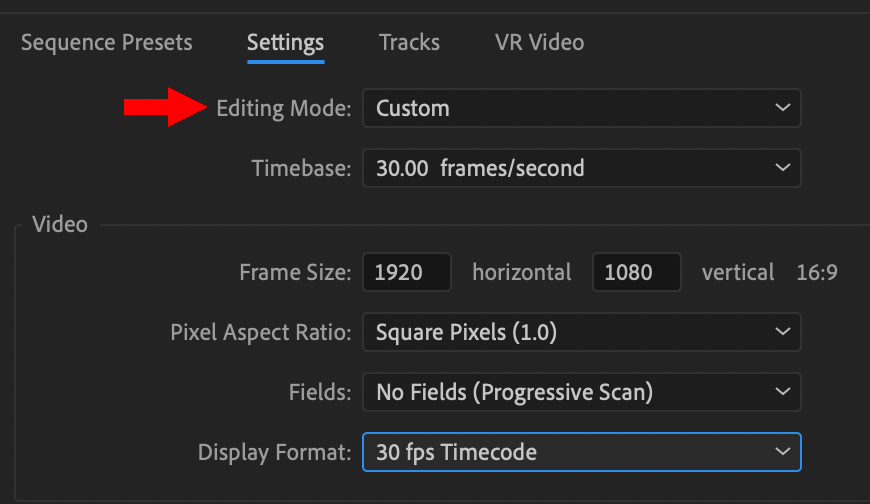
- Change Editing Mode to Custom.
- Change Timebase to match the frame rate you need to deliver.
NOTE: It is best to shoot the frame rate you need to deliver. In the event you can't, it is better to change the frame rate during editing, rather than later during compression.
- Set the Frame size to the size you need. In my example, I'm using 1920 x 1080.
- Set Pixel Aspect Ratio to Square Pixels. Virtually all current cameras shoot square pixels. The exceptions are: standard-definition video, HDV and some versions of Panasonic P2.
- Set Fields to Progressive, unless you know for sure that you need interlaced.
- Set the Display format to match the Timebase.
AUDIO
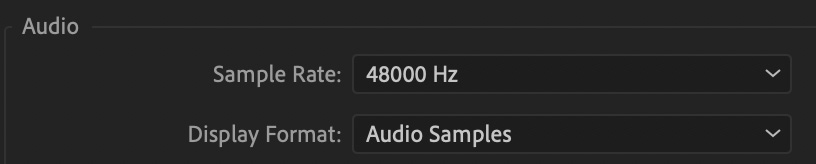
Leave the Audio settings alone, the defaults are fine.
VIDEO PREVIEWS
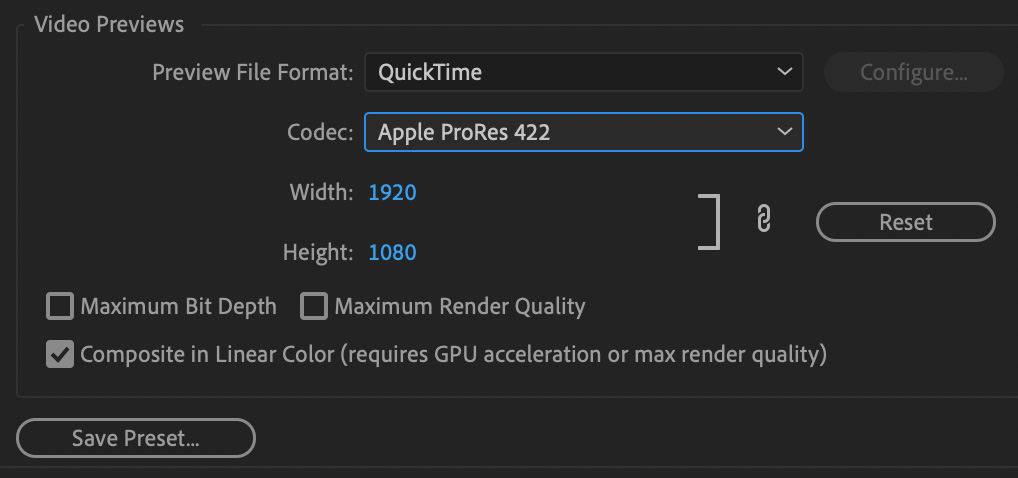
- Choose QuickTime. This setting determines the format you output in the event clips don't match the sequence setting.
- Set the codec to Apple ProRes 422. This codec is now supported on both Mac and Windows and works for all video shot by cameras.
NOTE: If you are shooting RAW or Log files, you'll probably find a preset that already exists. If not, use Apple ProRes 4444.
When the settings are complete, click the Save Preset button.
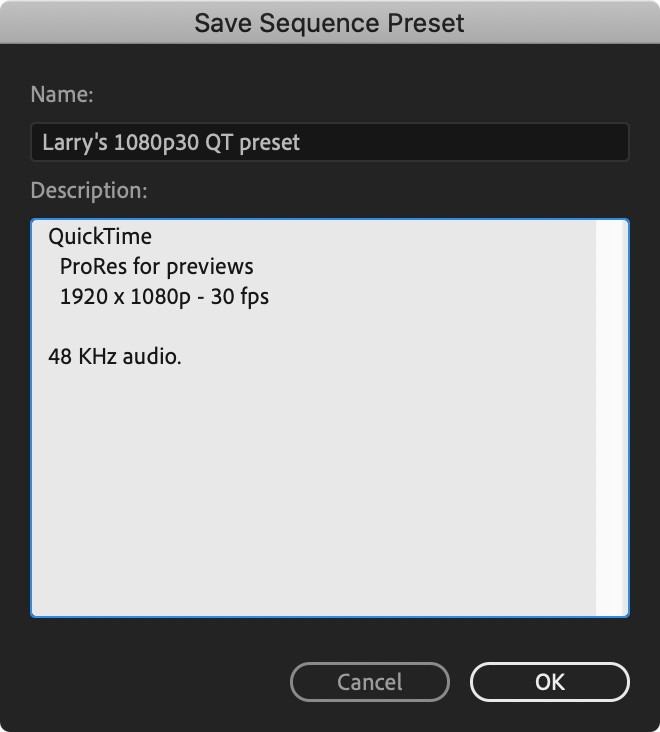
Give the new preset a name and description, then click OK.
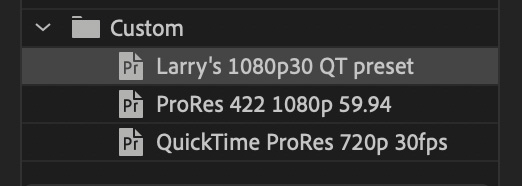
This new preset shows up in the category for which you created it – Custom, in our example.
EXPORT
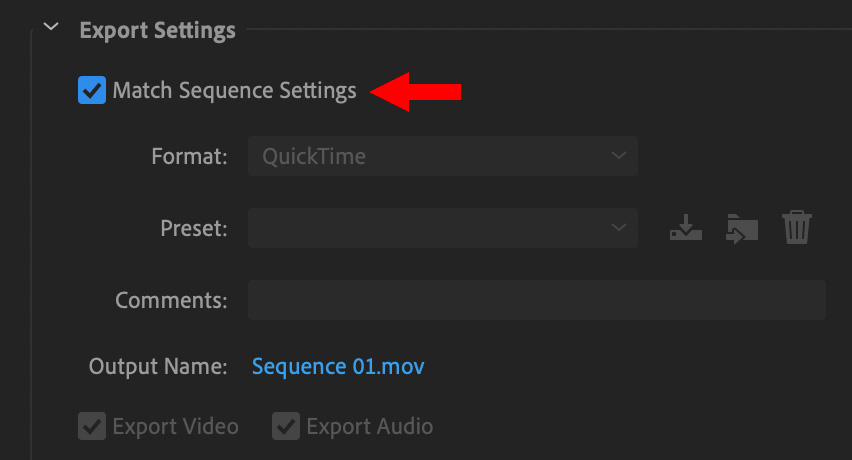
When you export your project, and choose the Match Sequence settings, Premiere will output a ProRes 422 sequence with uncompressed audio based on these settings.
Bookmark the permalink.
Larry Recommends:
![]()
NEW & Updated!
Edit smarter with Larry's latest training, all available in our store.
Access over 1,900 on-demand video editing courses. Become a member of our Video Training Library today!
JOIN NOW
Subscribe to Larry's FREE weekly newsletter and save 10%
on your first purchase.
How To Create Custom Sequence In Premiere
Source: https://larryjordan.com/articles/premiere-pro-create-a-custom-sequence-preset/
Posted by: gordonopoetinat1997.blogspot.com
0 Response to "How To Create Custom Sequence In Premiere"
Post a Comment