

How To Create A Erc20 Wallet
Overview
Ethereum network's launch in 2015 created a lot of buzz in the developer community and sprouted a lot of tokens on the network. Initially there weren't any templates or guidelines for token development. This resulted in a variety of tokens quite different from each other. To bring this diversity to order the community came up with an ERC-20 standard to make all tokens more or less uniform.
What is an ERC-20 token?
ERC stands for Ethereum Request for Comment, and 20 is the proposal identifier number. ERC-20 was designed to improve the ETH network. ERC-20 is one of the most significant ERCs. It has emerged as the technical standard for writing smart contracts on the Ethereum blockchain network, used for token implementation. ERC-20 contains a set of rules that all Ethereum based tokens must follow. ERC-20 defines tokens as blockchain-based assets that can be sent/received and have value. ERC-20 tokens are similar to Bitcoin and Litecoin in many aspects. However, the most significant difference is that instead of running on their own blockchain network, ERC-20 coins run on Ethereum's blockchain network and use gas as the transaction fee. Before the emergence of ERC-20, everyone who created tokens had to reinvent the wheel, which means all tokens were different from each other. For example, if a developer wanted to work with another token, they had to understand the entire smart contract code of that token due to the lack of any specific structure or guidelines for building new tokens. This was particularly painful for wallets and exchange platforms - adding different types of tokens required developers to go through the code of each and every token and understand it in order to handle those tokens on their platforms. Needless to say, it was rather difficult to add new tokens to any app. Today wallets and exchanges use the ERC-20 standard to integrate various standardized tokens onto their platforms and also facilitate easy exchange between ERC-20 tokens and other tokens. The ERC-20 token standard has made interaction between tokens almost seamless and painless. Token smart contracts are not only responsible for creating tokens but also for handling transactions and keeping track of the balances of each token holder. To get some tokens one has to send some ETH to the token's contract in return for allocated tokens. ERC-20 is a standard or guideline for creating new tokens. The standard defines six mandatory functions that a smart contract should implement and three optional ones. To start you can give your token a name, a symbol, and mention how dividable your token is, by specifying the decimals. ERC specifies a set of mandatory functions, which are a bit more complex and listed below: If you know something about Object Oriented programming you can compare ERC-20 to an Interface. If you want your token to be an ERC-20 token, you have to implement the ERC-20 interface and that forces you to implement these 6 methods.
Creating our own token.
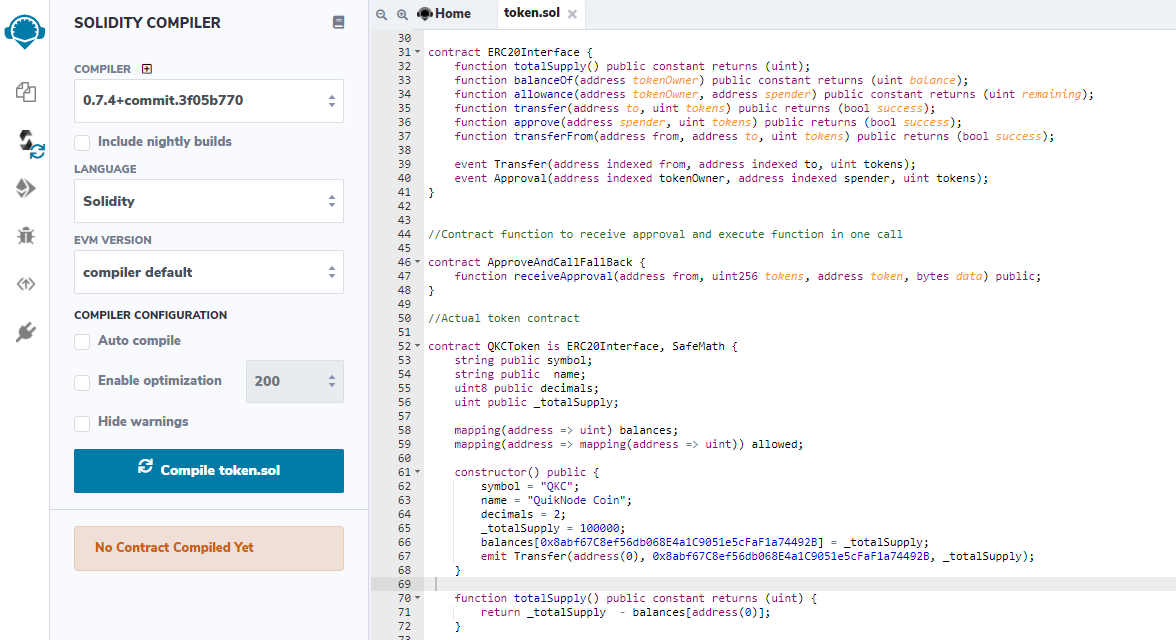
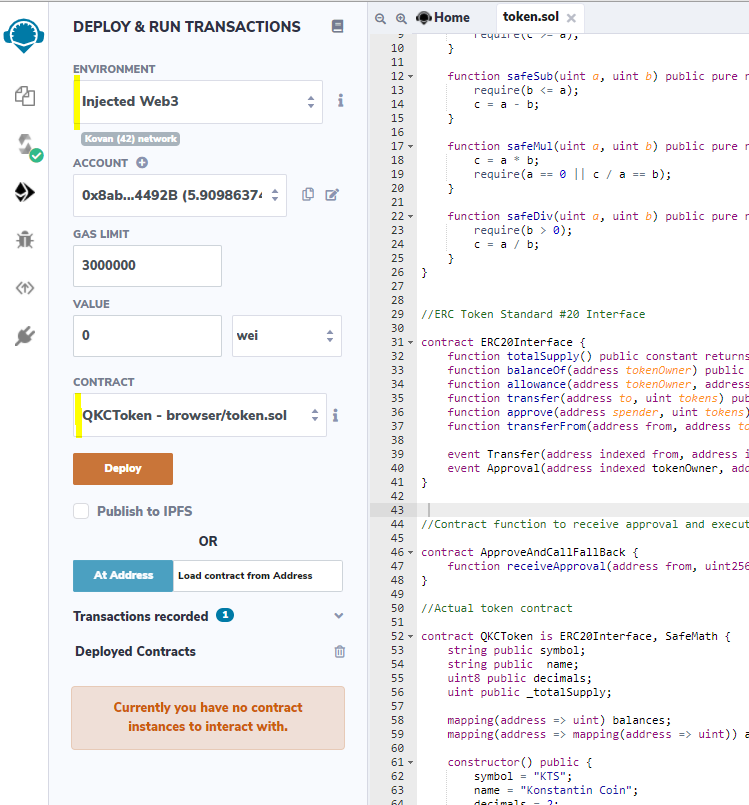
Now that we know what ERC-20 tokens are and how they work, let's see how we can build and deploy our own token. We'll deploy our contract on the Ropsten testnet. To get started, you will need the Metamask browser extension to create an ETH wallet and some test ETH, which you can get by going to the Ropsten faucet. You'll need to select Ropsten Test Network on your Metamask wallet and copy-paste the wallet address into the text field in the faucet, then click Send me test Ether. Head over to the Ethereum Remix IDE and make a new Solidity file, for example - token.sol Paste the following code into your new Solidity script: Replace the symbol and name with your own: 63 name = "QuikNode Coin"; set the decimal (value in which tokens can be divided, 0to8 decimal units can be used) and establish a total supply value as you wish: 64 decimals = 2; Please change YOUR_METAMASK_WALLET_ADDRESS to your own wallet address (same wallet you specified to obtain test currency): 66 balances[YOUR_METAMASK_WALLET_ADDRESS] = _totalSupply; 67 emit Transfer(address(0), YOUR_METAMASK_WALLET_ADDRESS, _totalSupply); Explanation of the code above: Line 1: Declaring the solidity version Line 3-4: Calling the Safe Math interface to use math functions in our contract. Line 29-41: Calling the ERC-20 Interface to implement its functions. Line 44-48: A Contract function to receive approval and execute a function in one call. Line 52-56: Starting our QKCToken contract, creating a variable symbol of string type to hold our token's symbol, a variable name of string type to hold our token's name, variable decimals of unsigned integer type to hold the decimal value for the token division. Line 58-59: Creating two mapping functions that will grant users the ability to spend these tokens. Line 61-68: Initializing the constructor, setting symbol, name, decimals, and total supply value for our token. Declaring the total supply of the token to be equal to your wallet's balance for this token. Line 70-72: Function totalSupply which will govern the total supply of our token. Line 74-76: Function balanceOf which will check the balance of a wallet address. Line 78-83: Function transfer which will execute the transfer of tokens from the total supply to users. Line 85-89: Function approve which will check if the total supply has the amount of token which needs to be allocated to a user. Line 91-97: Function transferFrom which will facilitate the transfer of token between users. Line 99-101: Function allowance which will check if a user has enough balance to perform the transfer to another user. Line 103-108: Function approveAndCall which executes the transactions of buying and spending of tokens. Line 110-112: Fallback function to prevent accounts from directly sending ETH to the contract, this prevents the users from spending gas on transactions in which they forget to mention the function name. Compile the smart-contract and deploy it using injected Web3 (make sure to select Ropsten testnet on Metamask before compiling the contract). Approve the transaction from metamask. If you receive an error message before deployment "This contract may be abstract", make sure to select the appropriate contract under the Contract tab. Confirm the transaction in Metamask That's it! your token contract is now deployed on Ethereum's Ropsten testnet! To get the token in Metamask, go to the "Deployed Contracts" section in Remix and copy the deployed contract's address using the copy button near the contract's name. Click on next and your token will be added to the wallet, it will be available under the assets section in Metamask.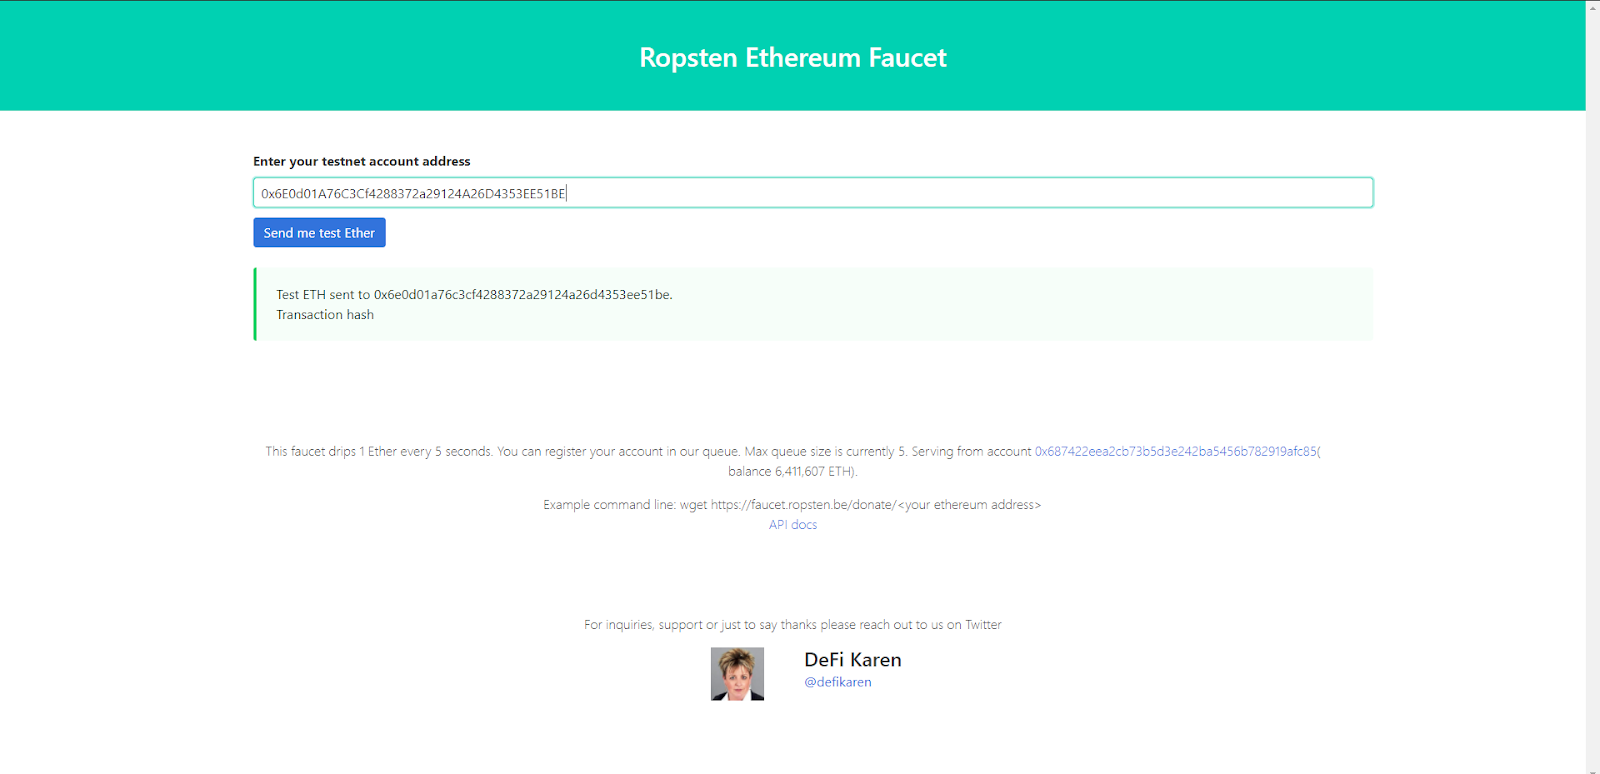
pragma solidity ^0.4.24; //Safe Math Interface contract SafeMath { function safeAdd(uint a, uint b) public pure returns (uint c) { c = a + b; require(c >= a); } function safeSub(uint a, uint b) public pure returns (uint c) { require(b <= a); c = a - b; } function safeMul(uint a, uint b) public pure returns (uint c) { c = a * b; require(a == 0 || c / a == b); } function safeDiv(uint a, uint b) public pure returns (uint c) { require(b > 0); c = a / b; } } //ERC Token Standard #20 Interface contract ERC20Interface { function totalSupply() public constant returns (uint); function balanceOf(address tokenOwner) public constant returns (uint balance); function allowance(address tokenOwner, address spender) public constant returns (uint remaining); function transfer(address to, uint tokens) public returns (bool success); function approve(address spender, uint tokens) public returns (bool success); function transferFrom(address from, address to, uint tokens) public returns (bool success); event Transfer(address indexed from, address indexed to, uint tokens); event Approval(address indexed tokenOwner, address indexed spender, uint tokens); } //Contract function to receive approval and execute function in one call contract ApproveAndCallFallBack { function receiveApproval(address from, uint256 tokens, address token, bytes data) public; } //Actual token contract contract QKCToken is ERC20Interface, SafeMath { string public symbol; string public name; uint8 public decimals; uint public _totalSupply; mapping(address => uint) balances; mapping(address => mapping(address => uint)) allowed; constructor() public { symbol = "QKC"; name = "QuikNode Coin"; decimals = 2; _totalSupply = 100000; balances[YOUR_METAMASK_WALLET_ADDRESS] = _totalSupply; emit Transfer(address(0), YOUR_METAMASK_WALLET_ADDRESS, _totalSupply); } function totalSupply() public constant returns (uint) { return _totalSupply - balances[address(0)]; } function balanceOf(address tokenOwner) public constant returns (uint balance) { return balances[tokenOwner]; } function transfer(address to, uint tokens) public returns (bool success) { balances[msg.sender] = safeSub(balances[msg.sender], tokens); balances[to] = safeAdd(balances[to], tokens); emit Transfer(msg.sender, to, tokens); return true; } function approve(address spender, uint tokens) public returns (bool success) { allowed[msg.sender][spender] = tokens; emit Approval(msg.sender, spender, tokens); return true; } function transferFrom(address from, address to, uint tokens) public returns (bool success) { balances[from] = safeSub(balances[from], tokens); allowed[from][msg.sender] = safeSub(allowed[from][msg.sender], tokens); balances[to] = safeAdd(balances[to], tokens); emit Transfer(from, to, tokens); return true; } function allowance(address tokenOwner, address spender) public constant returns (uint remaining) { return allowed[tokenOwner][spender]; } function approveAndCall(address spender, uint tokens, bytes data) public returns (bool success) { allowed[msg.sender][spender] = tokens; emit Approval(msg.sender, spender, tokens); ApproveAndCallFallBack(spender).receiveApproval(msg.sender, tokens, this, data); return true; } function () public payable { revert(); } }
62 symbol = "QKC";
65 _totalSupply = 100000; Note: The total supply value must have additional trailing zeros as specified by the decimals field. For example, the decimals value in this contract is 2 and we need a total supply of 1000 tokens, so we'll have to set the total supply variable to 100000 (simply because it won't allow a decimal point).
Note: We need to deploy the main token contract, select the name of the contract appropriately under the contracts section before deploying the contract (QKCToken here).
.png)
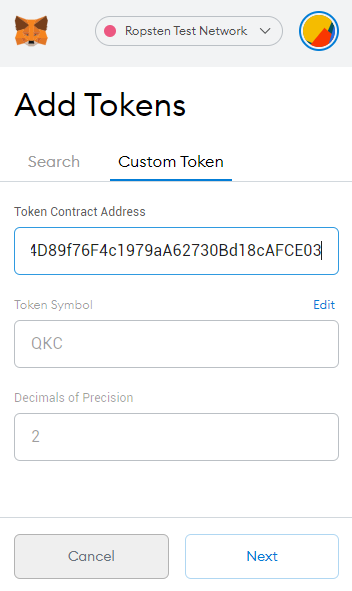
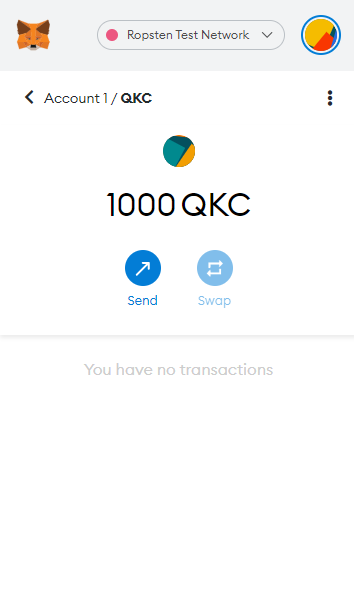
Open Metamask and click on the Add Token button, select the Custom Token option and paste the contract's address in the first field. Metamask will fetch the Token Symbol and decimals automatically.
Conclusion
Congratulations on successfully creating your very own token/coin on the Ethereum network! Read more about the ERC-20 standard here. Subscribe to our newsletter for more articles and guides on Ethereum. If you have any feedback, feel free to reach out to us via Twitter. You can always chat with us on our Discord community server, featuring some of the coolest developers you'll ever meet :)
How To Create A Erc20 Wallet
Source: https://www.quicknode.com/guides/solidity/how-to-create-and-deploy-an-erc20-token
Posted by: gordonopoetinat1997.blogspot.com
0 Response to "How To Create A Erc20 Wallet"
Post a Comment